With permission, I swiped this tutorial that hubby posted on our family blog a while back. After
Em told us about her delicious visit to Giordano's, I figured I'd share this fairly simple recipe to make your own Chicago Style Deep Dish Stuffed Pizza at home!
Want to make yourself some awesome pizza? Follow along carefully (or not) and you’ll soon know how to make Chicago-Style stuffed pizza. Of course, this is my method, and you’ll find there are lots of methods for doing this style of pizza.
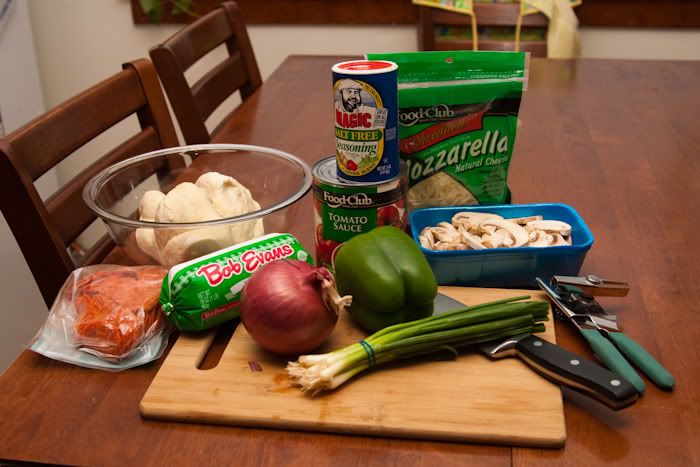
First, you need to get yourself some ingredients.

Yup, my method is not “pick up the phone and call Edwardo’s”. Here you have the ingredients for 2 kinds of pizza. I made a sausage, mushroom, and onion pizza and a pepperoni, onion, and green pepper pizza. If red and yellow bell peppers are priced well, they are a great option, too!
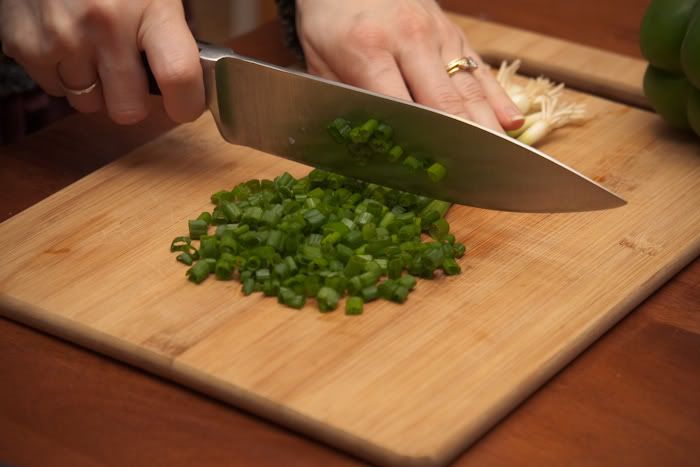
First step: Prepare the ingredients. I like to have all the veggies chopped and meat cooked (if needed), before I start on the dough. You can cook your onions and bell peppers if you want a softer veggie in your pizza or throw them in raw if you like a little bite and some fresh taste.

Bob Evan’s Italian Sausage and red onion. Mmmmmm….look at the steam…can you smell it?

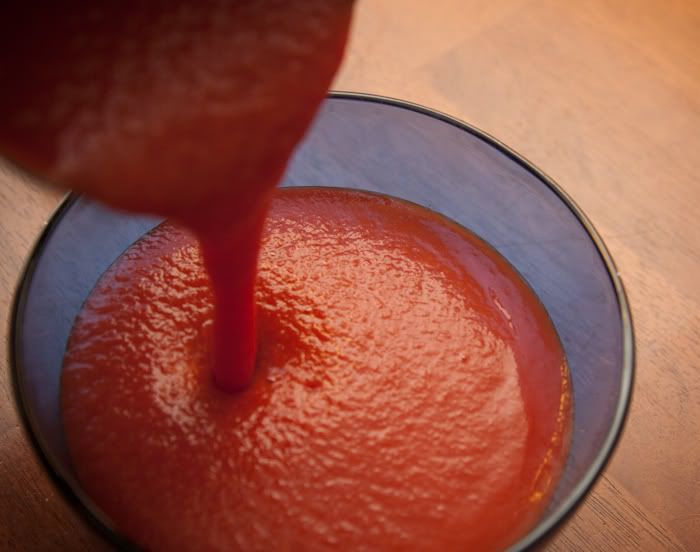
Pizza sauce? Make your own! I like to use tomato sauce (Contadina has the best flavor for pizza, in my opinion, but we had the good old Food Club in the house) and season it how you like.
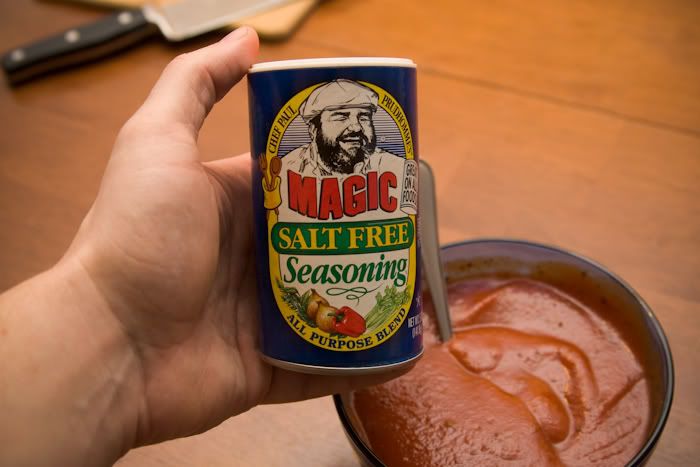
This time I picked Paul Prudhomme’s Magic seasoning. It really is a good blend for pizza. It has some brown sugar in it, so it sweetens the sauce a little bit.
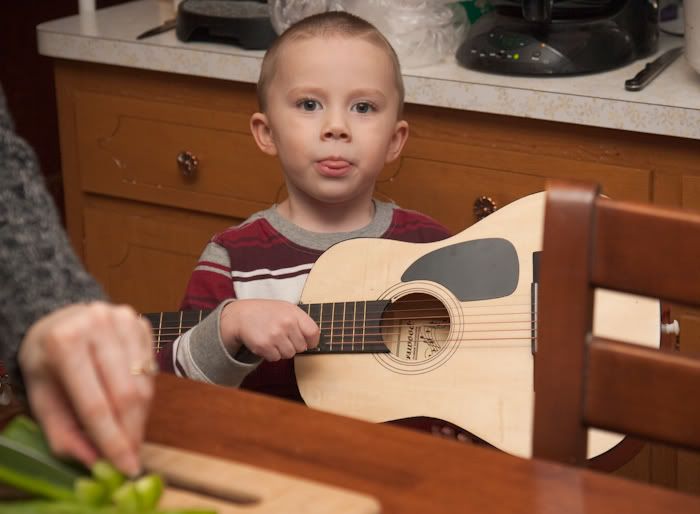
Some mood music is always nice. This day we got “goofy toddler thinks he’s Jimmy Hendrix”.
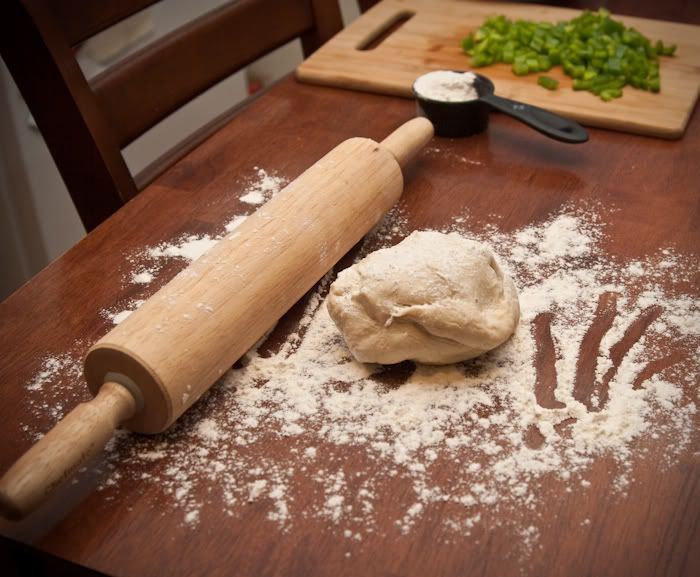
Here’s my shortcut. I’m sure anyone from Chicago name Gino would not approve, so please don’t tell on me. I have found that the frozen pizza dough from the grocery store works really well. You’ll need two dough-balls for each pizza. Roll one out large enough to sit down in the pan and overlap the side a little bit. The second needs to be just a little larger than the top of your pan to be able to lay it on top of all of the ingredients. This is definitely a “pizza pie”!
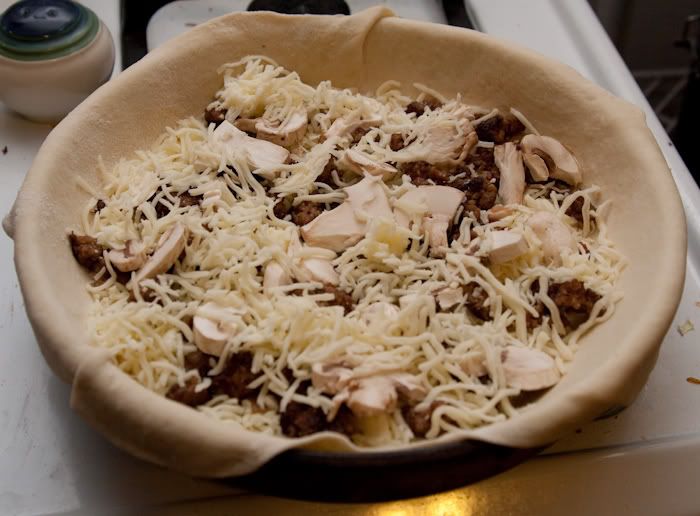
Dough #1 is done and filled with a layer of mozzarella cheese, then your ingredients, then a little more cheese on top. The pan I use is a Pampered Chef deep-dish baking stone. Make sure to rub a thin layer of olive oil on the pan for easy removal when it’s done baking. Most restaurants use a metal deep-dish pizza pan.
Lay the second dough on top, roll the edges of both doughs together, and coat the edge of the dough with olive oil.

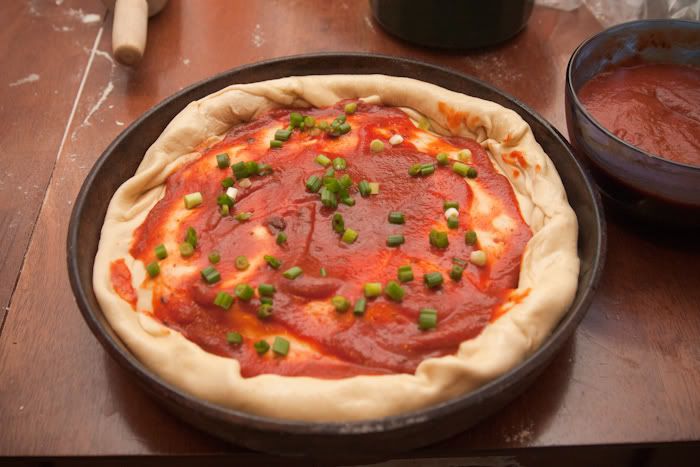
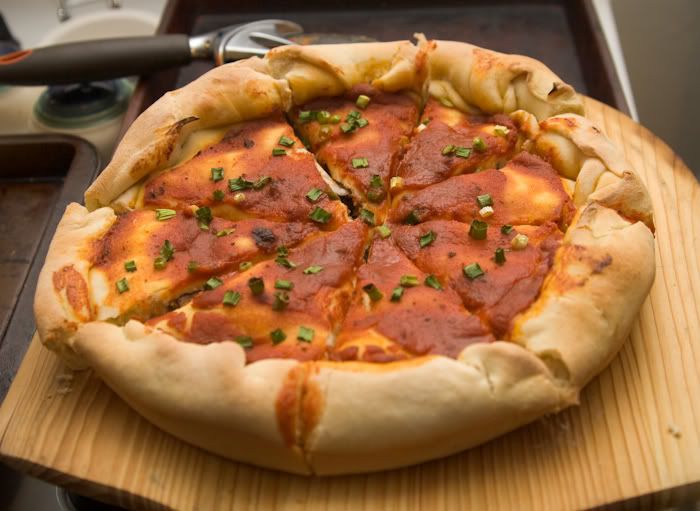
The sauce goes on top! Yes, you heard me right. Keep that sauce out of the inside and cover the top with it. I like to garnish mine with the diced green onion.
Stick it in a 425 degree oven for about 20 minutes, and voila! That’s one perfectly baked Chicago Style stuffed pizza.
(Mindy back now) Well, I guess this constitutes being a guest-poster! I'll make sure he puts it on his resume ...that I hope we won't have to use for a long time.
A few ideas for variations for you:
We've used our bread maker for the pizza dough a couple of times. This works well if you plan ahead for the time it will take to rise properly (in our machine, about 1 hour 40 minutes total).
We have also found that we like Dei Fratelli Presto! Pizza Sauce as a pre-made substitute. It has very good flavors and seasoning.
Garnish the top with a couple sliced black olives instead of green onions to differentiate between which ingredients you've used in which pizza.
I really hope you try it. It was a little intimidating the first time around, but it is
definitely worth it! And practice makes perfect, right? Yum...


